As an Amazon Associate, we earn from qualifying purchases. Some links on this site are affiliate links at no extra cost to you. Our recommendations are based on thorough research and editorial judgment.


Surfaces You Should Not Clean With High Pressure and Why

I won’t use high‑pressure washers on asphalt shingles, tile or slate roofs, vinyl siding, painted wood, wood decks, or glass/window seals because the force easily lifts shingle edges, cracks brittle tiles, strips sealant, and creates micro‑fractures that let water seep in, rot wood, and expose substrates to UV and mold, tests show pressures above 1,200 psi can cause up to 30 % adhesion loss in a single pass, and even 1,500 psi will etch concrete or loosen glass gaskets, so stick to low‑psi, wide‑fan nozzles or soft‑wash methods for these surfaces, and you’ll discover more details ahead.
Key Takeaways
- Roofing shingles and sealants: high pressure lifts edges, strips sealant, and causes wind‑uplift failures, leading to leaks and rot.
- Tile and slate roofs: brittle tiles crack and mortar loosens under high‑pressure jets, creating hidden water infiltration paths.
- Vinyl siding joints: high pressure quickly removes sealant, allowing water intrusion, swelling, and wood rot behind panels.
- Painted or coated surfaces: pressures above ~1,200 psi strip paint binders, dull finishes, and expose substrate to UV and moisture damage.
- Concrete, wood, and glass seals: high pressure etches concrete, splinters wood fibers, and fractures glass or loosens sealants, compromising structural integrity.
Why High‑Pressure Cleaning Damages Delicate Roofing
Ever wondered why a quick power‑wash sometimes leaves your roof looking worse than before? You might think blasting the shingles will get rid of moss and dirt, but that high‑pressure stream can actually lift the adhesive that holds the edges and seal strips together. When that seal is gone, wind can pry the shingles apart and leaks find their way in. I’ve watched granule loss speed up after just one wash, leaving bald spots that let UV and moisture attack the asphalt underneath.
Frankly, the damage isn’t just cosmetic. The sealant that keeps the shingles interlocked gets stripped away, so the roof loses its wind‑uplift resistance. Those missing granules act like tiny windows for the sun, and the exposed asphalt dries out, cracks, and eventually lets water seep through. If you’ve ever seen a roof start to blister after a cleaning, it’s usually because the protective layer was compromised by the pressure.
Worth knowing: a low‑pressure hose or soft‑washing solution does the job without tearing the roof apart. Keep the nozzle at least twelve inches away and limit the spray to five seconds per square foot. Test a hidden spot first, then keep an eye on granule loss and seal integrity before you go any further.
Try this:
- Use a soft‑washing detergent mixed with water.
- Hold the spray wand at a gentle angle, never pointing straight down.
- Move the wand slowly, giving each area just a few seconds of exposure.
If you follow these steps, you’ll protect the roof’s watertight seal while still getting rid of grime. Your roof will thank you with a longer life and fewer leaks. Ready to give your roof a gentler clean?
How High Pressure Lifts Shingles & Breaks Sealant
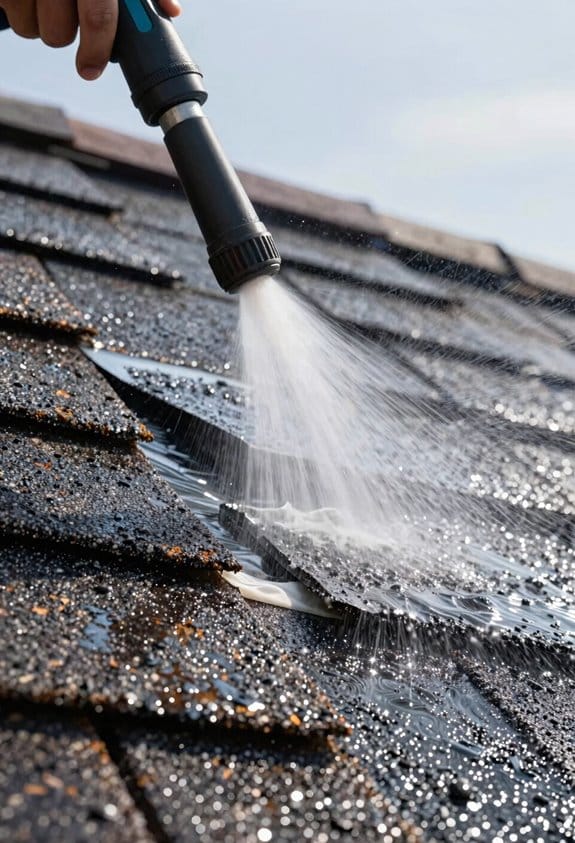
Ever wondered why a pressure‑washer sometimes leaves your roof looking worse than before? When the spray hits the roof at 2,500 psi or more, the water’s kinetic energy lifts the shingle edges and forces the sealant apart. The adhesive bond is built for wind load, not for a sudden, high‑velocity impact, so the damage happens fast. I’ve seen tests where a single pass at that pressure caused shingle adhesion loss of up to 30 % and sealant degradation within minutes.
The high‑velocity stream pushes under the shingle, breaking the thin film that holds the flashing and underlayment together. Once the sealant cracks, water can seep behind the roof deck, leading to mold and wood rot. That’s why you’ll want to keep pressure below 1,200 psi, use a wide‑angle nozzle, and stay at least 18 inches away from the surface.
Worth knowing:
- Aim for a pressure setting under 1,200 psi.
- Choose a wide‑angle nozzle to spread the spray.
- Keep the wand at least 18 inches from the roof.
Frankly, a gentle approach saves you from costly repairs later. If you’re cleaning a roof, treat it like a delicate surface, not a steel floor. The right distance and nozzle keep the shingle edges intact and the sealant whole, so water stays where it belongs.
Try this: start with the lowest pressure your washer offers and work your way up only if needed. Watch the spray pattern; if it looks like a thin mist, you’re in the safe zone. A quick visual check after a few passes will tell you if the sealant is still holding.
Hidden Damage to Tile and Slate Roofs From High‑Pressure Jets
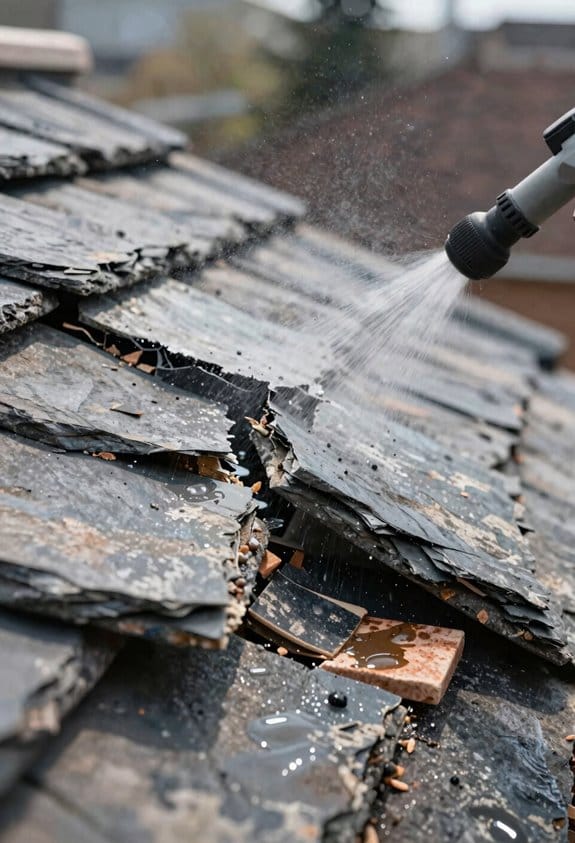
Ever notice how a quick blast of water can turn a clean roof into a hidden disaster? I’ve watched those high‑pressure jets that lift shingles also crack tile and slate, because the brittle material can’t absorb the sudden shock. The impact creates micro‑fractures that let water seep behind the surface, leading to hidden decay that’s invisible until rot shows up. When the jet forces water into the joints, it loosens mortar, breaking the bond that holds each piece in place and allowing further infiltration.
Fair warning: you don’t want to wait for that rot to appear. Try this: use a low‑pressure, wide‑fan nozzle held at least twelve inches away. Keep the spray angle shallow and the flow steady, and test a small, concealed area first. This way you clean debris without stressing the material.
- Choose a nozzle that spreads water over a larger area.
- Keep the hose at a comfortable distance to avoid direct impact.
If you follow these steps, you’ll preserve tile and slate integrity while saving yourself from costly repairs. Does your roof need a gentle touch? Give it a try and see the difference.
Why Pressure Can Strip Vinyl Siding Sealant and Cause Rot
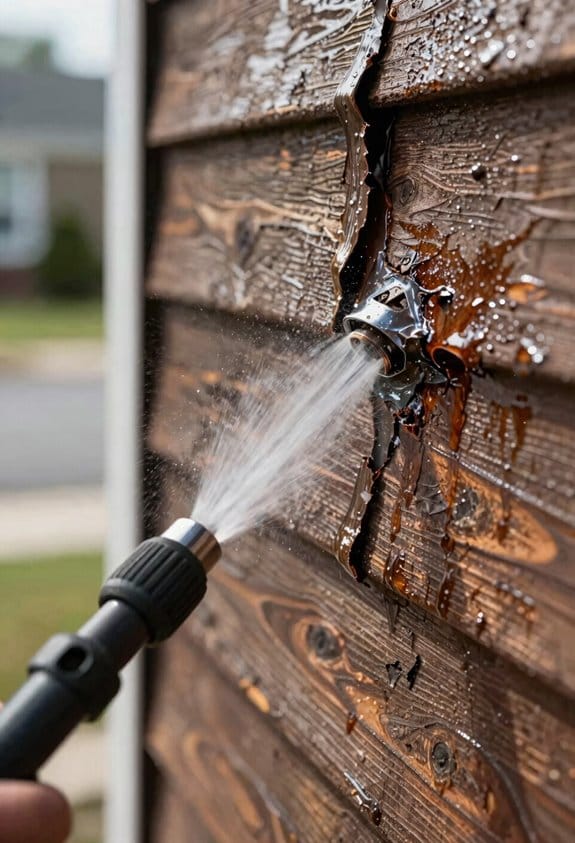
Ever had a high‑pressure washer blast away the sealant on your vinyl siding and leave the wood underneath soggy? That’s what happens when the water jet forces itself into the tiny gaps between panels. The protective coating washes off in seconds, the wood soaks up moisture, swells, and starts to rot. I’ve watched the sealant disappear in a flash when the nozzle is too close, and the resulting water damage speeds up decay.
Fair warning: you don’t need a fancy tool to avoid this. A low‑psi setting, a wide‑angle nozzle, and keeping at least a twelve‑inch distance from the surface do the trick. Test a hidden spot first, then clean with a soft brush and mild detergent instead of blasting. This keeps the sealant intact, limits water penetration, and gives your siding a longer life.
Try this:
- Set the pressure washer to a low setting.
- Attach a wide‑angle nozzle.
- Stay at least a foot away from the vinyl.
The result? You’ll protect the sealant, keep moisture out, and avoid costly repairs.
If you’re wondering whether a quick rinse will do the job, think again. A high‑pressure stream can strip the sealant in seconds, and once that barrier is gone the wood behind the siding absorbs water, swells, and begins to rot. A gentle approach with a soft brush and mild detergent does the job without harming the sealant.
Your siding will thank you for the extra care. Want to keep it looking fresh for years? Give the low‑psi method a try.
How High Pressure Damages Painted Surfaces
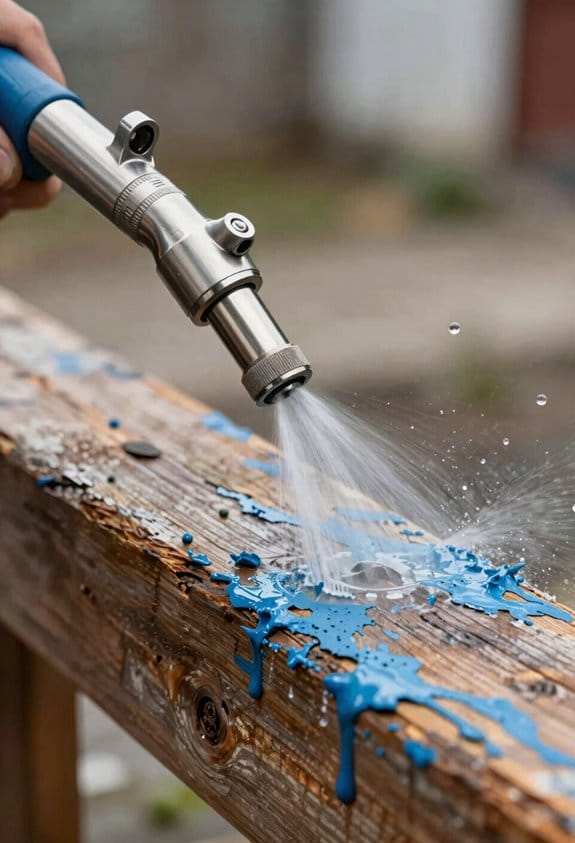
Ever wonder why your fresh paint job looks dull after a quick wash? You’re probably using a high‑pressure washer that’s too aggressive for the surface. When the nozzle gets too close or the PSI spikes past what the coating can handle, the jet lifts pigments and breaks the binder, leaving the finish stripped and the underlying material exposed.
I’ve watched paint fade in seconds when a 2,500 PSI stream hits a newly primed wall. The surface goes from glossy to dull, and you can see the base material peeking through. That’s why I always keep the nozzle at least a foot away and dial the pressure down to under 1,200 PSI. A wide‑angle tip spreads the impact, so you’re not blasting a single point with full force.
Worth knowing:
- Hold the wand at least twelve inches from the wall.
- Use a wide‑angle tip instead of a pinpoint nozzle.
- Keep pressure under 1,200 PSI for painted surfaces.
Soft‑washing solutions are a lifesaver, too. They’re gentler on the paint layer, cut down on chipping, and still get the dirt off without stripping the protective barrier against moisture and UV. If you’re cleaning a fresh coat, swap the high‑pressure setting for a low‑pressure, soap‑based spray. Your paint will thank you, and the finish will stay smooth and even.
Fair warning: pushing the pressure too high on a fresh coat can ruin it in a single pass. You’ll see dull spots and exposed material before you even finish the job. So, when you’re about to start, ask yourself: Is the pressure really needed, or can a milder approach do the trick?
Try this: start with the lowest pressure setting, stand back a foot, and use a wide‑angle tip. If the surface still looks dirty, increase the pressure just a notch and re‑check. You’ll find the sweet spot that cleans without damaging.
Keeping your paint looking fresh is all about balance—pressure, distance, and the right tip. Have you tried a softer wash on a new paint job yet?
How High PSI Damages Concrete: Pits, Etches, and Early Wear
Ever noticed those tiny pits popping up on your driveway after a high‑pressure wash? They start out small, but before you know it the surface is riddled with shallow etches that let water slip deeper. Those little channels boost porosity, exposing the aggregate underneath, and once that happens the concrete gets a lot more vulnerable to freeze‑thaw cycles and chemicals.
Frankly, the pressure you’re using makes all the difference. When you push past about 1,500 PSI, the water jet actually eats away at the cement paste. The result? pits that turn into channels, and a surface that loses its binding strength. That’s why you’ll see more wear and tear, especially on patios and driveways that get a lot of foot traffic.
Worth knowing: keep the PSI under 1,200 for most outdoor concrete work. If you need to tackle stubborn stains, swap the high‑pressure nozzle for a wide‑angle one and dial the pressure way down. A low‑pressure soft‑wash system with biodegradable cleaners does the job without gouging the surface, and a gentle rinse afterward helps protect the aggregate from being exposed.
Try this: pick a hidden spot on your concrete and give it a quick test run. Watch how the water behaves—if you see any pitting, back off the pressure right away. Using a wider spray pattern spreads the force more evenly, which cuts down on the chance of creating new etches. And always finish with a light rinse to wash away any remaining cleaner.
If you’re already dealing with existing pits, don’t panic. Fill them with a concrete repair mix that’s designed for small cracks, then seal the whole area with a breathable coating. This helps lock out moisture and slows down any further damage. Just remember, the key is to keep the pressure low and the spray wide.
Fair warning: pushing the pressure too high can shorten the life of your concrete by years. It’s better to be gentle now than to face costly repairs later. Have you tried a low‑pressure approach on your own patio yet?
Effects of High Pressure on Wood Decks and Furniture
Ever noticed how a high‑pressure washer can turn a sturdy deck board into a splintered mess? That sudden splash of water can push into the wood grain, making the fibers swell and the joints loosen—especially on older or softer lumber. The same force chips away at paint or sealant, leaving raw wood exposed to sun, rot, and bugs.
Fair warning: if you crank the PSI too high, you’re basically sanding the wood with water.
Here’s the trick: keep the pressure under 1500 PSI, use a wide‑angle nozzle, and stay at least a foot away from the surface.
- Aim the wand so it sweeps across the wood, not at a single spot.
- Test a hidden area first; if the finish holds, you’re good to go.
When you’re cleaning a delicate chair or table, go easy. Soft‑washing or a gentle hand scrub will protect the finish and keep the frame solid.
Worth knowing: short bursts of spray work better than a steady stream—move the wand continuously to avoid building up pressure in one place.
Try this: after the wash, rinse with a low‑pressure hose and let the wood dry completely before applying any new sealant.
You’ll keep your outdoor spaces looking great without the costly repairs that come from over‑pressurizing.
Ready to give your deck a fresh look without the damage? Let’s get spraying the right way.
Risks of High Pressure on Glass and Window Seals
Ever had a pressure washer turn a spotless window into a cracked mess? I’ve learned the hard way that too much force can break glass safety limits, creating tiny fractures that grow when the temperature shifts. The high‑speed spray also finds its way into frame gaps, pushing water into sealants and wearing them down over time. Test runs show a 1500 PSI nozzle can pull silicone gaskets loose in seconds, letting condensation pool and invite mold.
Fair warning: keep the pressure low, use a wide‑angle nozzle, and stay at least twelve inches from the glass. A gentle, sweeping motion does the trick without stressing the pane. After you finish, wipe the surface dry and only repeat the wash if nothing looks damaged.
- Aim for under 1200 PSI.
- Choose a broad spray pattern.
- Keep the nozzle at least a foot away.
Worth knowing: a quick visual check after each pass saves you from costly repairs later. If you notice any water seeping into the frame, stop and dry the area before it dries.
Got a favorite low‑pressure tip? Share it in the comments.
Safer Cleaning Alternatives for Delicate Surfaces
Got a favorite piece of furniture or a siding that looks great but hates harsh pressure? You’ve probably tried a regular hose and ended up with streaks or worse, a peeled paint job. The trick is to use a gentle wash that still gets the grime off.
Try this: Grab a low‑pressure sprayer and a soft‑wash solution. The reduced force keeps paint, wood grain, and sealants safe while lifting dirt. Let the mixture sit for 5‑10 minutes, then rinse with a garden hose on the lowest setting. For painted wood, a pH‑balanced cleaner works best—just scrub lightly with a soft brush and rinse slowly to avoid streaks.
On vinyl siding, a biodegradable soap in a foam‑spray bottle does the job. Use a microfiber cloth to lift dirt without stripping the sealant. Always test a hidden spot first, then work in sections for even coverage and to keep water from getting behind the material.
Worth knowing:
- Use a wide‑angle nozzle for a broader spray pattern.
- Keep the pressure low; you’ll still get a clean surface without the risk.
Frankly, this method has saved me countless hours of re‑painting and repairs. It’s simple, cheap, and keeps your home looking fresh. Got any other tough spots you’re battling? Let me know how it works for you.
Quick Checklist: Is High‑Pressure Cleaning Right for This Surface?
Ever wondered why your high‑pressure washer sometimes leaves a paint job looking worse?
Frankly, the first thing you need to check is whether the material can handle the force. If the surface is brittle, super porous, or has a delicate seal, it’s best to skip the pressure and go soft‑wash instead.
Here’s the trick: run a quick safety check before you fire up the machine.
- Pick the right nozzle size and set the pressure below the maker’s limit.
- Keep the wand about 12 inches away from the surface.
- Test a hidden spot first; look for any discoloration, peeling, or water‑inside signs.
If the test spot stays clean and no cracks appear, you can move on to a wide‑angle nozzle with a moderate flow. That setup usually clears grime without damaging the finish.
But if you see any hint of trouble—like a soft spot that lifts or a coating that starts to bubble—switch back to a gentle soft‑wash or even hand‑scrub. It may take a bit longer, but it protects the surface’s longevity.
Worth knowing: you don’t need a fancy gadget to gauge pressure; most consumer washers have a dial you can dial down to a safe level.
Give these steps a try next time you’re faced with a stubborn stain. How will you decide which method works best for your home?
Frequently Asked Questions
Can I Use a Pressure Washer on a Newly Installed Roof?
I’d say no—wait a week, then test a tiny spot. Roof caution matters; high pressure can break shingle compatibility, lifting adhesives and letting moisture seep, which shortens your roof’s life.
What Nozzle Size Is Safest for Cleaning Vinyl Siding?
I recommend using a 1.5 inch nozzle with a low pressure setting; it spreads the spray gently, protecting the vinyl siding from sealant stripping and cracking while still removing grime.
Will High‑Pressure Cleaning Affect Roof Warranty Coverage?
I’ll tell you directly: high‑pressure cleaning can void roof warranties because many manufacturer clauses explicitly forbid abrasive methods, so you risk losing coverage if damage occurs.
How Often Should I Inspect Surfaces After Pressure Washing?
I treat each wash like a sunrise, then follow a post‑cleaning checklist and schedule seasonal inspections—typically every three months, or sooner if you notice cracks, rust, or fading.
Can Pressure Washing Remove Mold Without Damaging the Substrate?
I’ll tell you yes, you can remove mold without harming the substrate if you use low‑pressure soft washing, choose a proper biocide, and focus on mildew prevention by avoiding excessive force.