As an Amazon Associate, we earn from qualifying purchases. Some links on this site are affiliate links at no extra cost to you. Our recommendations are based on thorough research and editorial judgment.

Basic Maintenance Tasks That Extend Pressure Washer Life
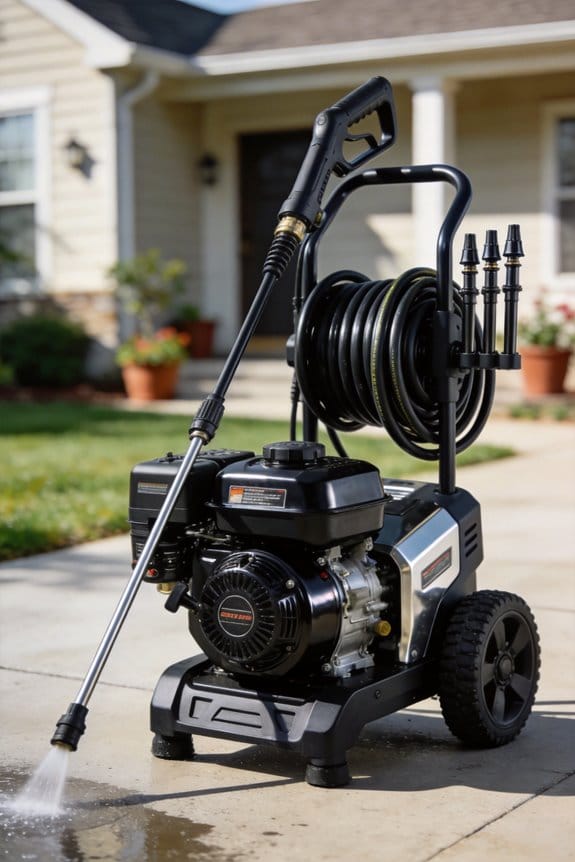
I inspect hoses for cracks, tighten every fitting, and run a two‑minute clean‑water cycle before adding detergent to confirm pressure integrity. I wipe the exterior with a damp cloth, flush the interior for two minutes, then dry and coat metal parts with UV‑protective spray. I check oil with the dipstick, refill to the midpoint between min and max, and lubricate pump seals and bearings with the specified grease. I clean the inlet screen, detergent strainer, and nozzle, replacing filters roughly every 200 hours. I verify the power cord is undamaged, the outlet voltage matches specs, and the unit is grounded. I store the washer dry, cool, and covered, adding fuel stabilizer before long‑term storage. Following these steps consistently will keep the washer reliable and extend its service life, and the next section explains how to troubleshoot any issues that arise.
Key Takeaways
- Inspect and tighten hoses, fittings, and connections regularly to prevent leaks and pressure loss.
- Clean or replace filters, detergent strainer, and nozzle after each use to maintain flow and spray quality.
- Check oil level, replace oil at recommended intervals, and lubricate pump seals and bearings.
- Drain fuel, add stabilizer, and use fresh gasoline; replace fuel filter every ~200 hours.
- Run a short clean‑water pump cycle before each session to verify pressure system integrity and catch issues early.
Quick‑Start Pressure Washer Maintenance Checklist
Ever you you of a pressure washer that sputters at the first push? Before you dive into any cleaning job, a quick‑start checklist can save you time, money, and frustration.
First, give the whole unit a once look. Check every hose for cracks and make sure all fittings are tight. Run your fingers along the power cord; any frayed spots need a replacement right away. Then, pop the oil cap and verify the level matches the manufacturer’s spec—low oil is a common cause of overheating. Fresh, filtered fuel is a must; old gasoline can gum up the pump.
Next, listen to the pump as you fire it up. Any strange noises or excessive vibration? that something’s off. Take off the nozzle and clean it thoroughly; a clogged tip will spray weakly. While you’re at it, pull out the detergent strainer and clear any debris. A clean water supply line prevents clogs and protects the pump.
Finally, give the trigger and spray gun a test run. Look for steady pressure and watch for leaks at the connections. If everything feels solid, you’re ready to tackle the job with confidence.
Try this: keep a small notebook in your toolbox and jot down any quirks you notice during each inspection. Over time you’ll spot patterns and know exactly what to fix before a breakdown happens.
Fair warning: skipping any of these steps can lead to costly repairs or even a dangerous malfunction.
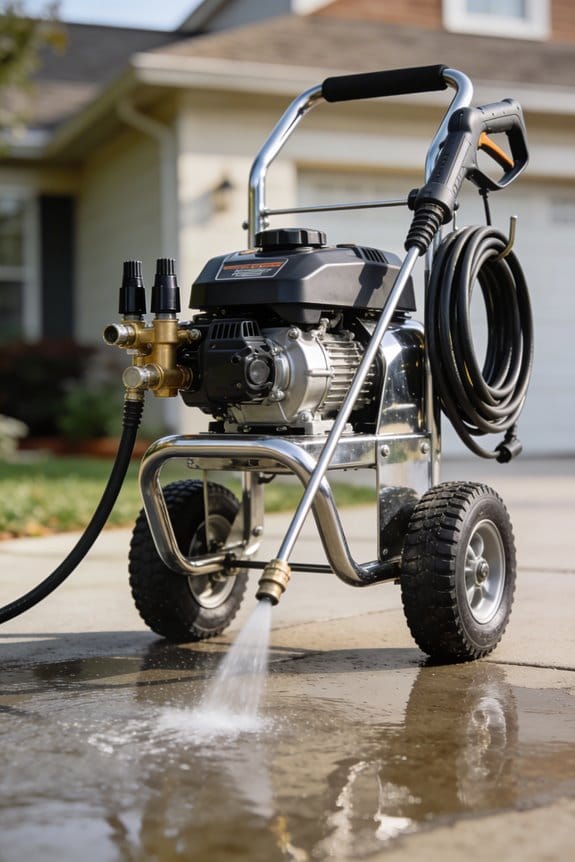
Exterior & Interior Cleaning Steps for a Pressure Washer

Ever had a pressure washer sit in the corner gathering dust, only to discover it’s clogged or rusted when you finally need it?
When you’re getting ready for the next job, start by wiping the exterior with a soft, damp cloth. That gets rid of dust, grease, and loose debris. Then give the surface a quick look‑over for cracks, rust, or worn seals—any of those can let water sneak in and cause corrosion.
Worth knowing:
- Use a low‑pressure spray to rinse off grime without stripping the paint.
- Open the pump housing and flush the interior with clean water for about two minutes.
After the flush, check the water intake for blockings. Drain everything, then dry all metal parts with a microfiber towel. A thin layer of UV‑protective coating on painted surfaces helps keep the sun from fading them.
Next, reassemble the seals and double‑check every connection. Store the unit in a dry, temperature‑controlled spot so it stays ready for your next project.
Frankly, a little extra care now saves you a lot of hassle later. Have you tried this routine before?
Give it a try and see how much smoother your jobs run.
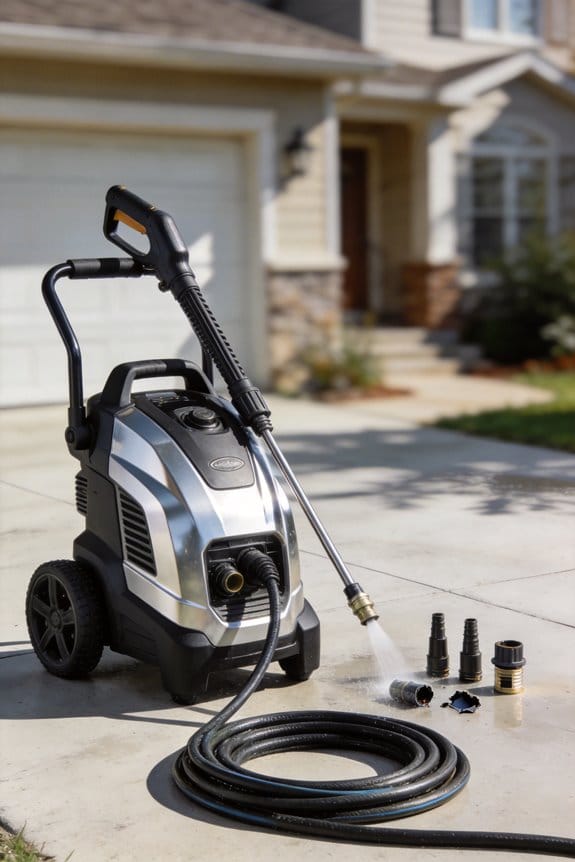
How to Keep Your Filters Clean and When to Replace Them

Ever notice how your pump starts humming louder after a few weeks? That’s usually a sign your filters are getting clogged, and it can mess with water flow and wear down the pump faster than you’d like.
First, pull out the inlet screen. Give it a good rinse under the tap and tap it lightly to shake off any stubborn bits. If you see a little grime left, a soft brush will clear it without hurting the mesh. Next, check the detergent strainer. Flush it with a quick burst of high‑pressure water to make sure nothing’s blocking the path.
Worth knowing:
- Keep a log of how long each filter lasts; most brands suggest a 200‑hour replace before you think about swapping it out.
- If you see a drop in pressure or spot tears or rust during a visual check, replace the filter right away to protect your pump.
Frankly, staying on top of this routine saves you from bigger headaches later. It only takes a few minutes, and you’ll keep the system running smooth and quiet.
Got a favorite trick for cleaning filters? Share it in the comments!
Recommended Products

𝗩𝗶𝗯𝗿𝗮𝗥𝗶𝘀𝗲 𝟱.𝟬 𝗠𝗼𝗽𝗽𝗶𝗻𝗴: Paired with a system delivering 4,000 vibrations per minute, the 14N boosted downward pressure breaks down tough kitchen grease and coffee spills. The extendable mop head presses into edges, unlocking 27% larger corner coverage, reaching tight spaces, cleaning waIIs, harming no delicate surfaces.

NEW- Re-engineered low power coil with up to 50 percent less heat generation. The valve starts as 19W and as it heat up to operating temperature power reduces to approx. 10-13W

PREMIUM MONITOR: 4K UHD (3840x2160) advanced ergonomic, 60Hz IPS monitor deliver lifelike colors perfect for office, graphic design, photographers and more
Pressure Washer Nozzle Cleaning and Inspection for Optimal Spray

Ever notice how your pressure‑washer starts sputtering and the spray looks uneven? That usually means the nozzle’s getting clogged or mis‑aligned. Keeping it clean is a simple habit that saves you time and money.
Here’s the trick:
- Detach the nozzle and soak it in warm, soapy water for about five minutes.
- Use a thin needle to poke out any debris from the tiny holes—be gentle so you don’t chip the ceramic tip.
After it dries, snap the nozzle back on and give it a quick test on a flat surface. Watch the spray arc; if it’s wobbly, adjust the gun until the pattern looks smooth. Then, grab a pressure gauge and verify the output matches what the maker lists.
Worth knowing:
- Store the nozzle in a dry container to keep rust away.
- Do this whole routine about once a month for best results.
Frankly, a clean nozzle means steady pressure, less wear on the pump, and longer life for your whole unit. Give it a try and see how much better your cleaning gets.
Ready to keep your washer firing on all cylinders?
Recommended Products

20" LED Rainfall Shower Head: Enjoy a luxurious shower experience with the expansive 20" LED rainfall shower head. The integrated 64-color LED lights provide a relaxing ambiance, enhancing your shower experience while adding a touch of visual delight.

KRANZLE K1622TS 1600 PSI, 1.7 GPM PRESSURE WASHER

2-IN-1 PRESSURE WASHER & JETTER: Switch instantly between high-pressure surface cleaning and hydro jetting / drain cleaning with one professional-grade machine – perfect for driveways, patios, pipes, and sewer lines [Ships by LTL freight]
When and How to Check Oil Levels and Lubricate

Ever noticed your pressure washer sputtering after a few jobs? That’s usually a sign the pump’s oil is low or the seals need a fresh coat of grease.
First, find the dipstick and pull it out. Wipe it clean, pop it back in fully, then pull it out again to check the level. If the oil sits below the minimum mark, add the type the maker recommends until it’s halfway between the min and max lines.
Next, give the pump’s moving seals and the motor’s bearings a thin, even layer of the specified grease. Too much can cause buildup, so just a light coat will do.
Try this:
- Do the oil check every 50‑hour use interval.
- Write down the date and what the oil looks like in a log.
Doing this regularly keeps the pump running smooth and helps you avoid costly repairs.
Frankly, a quick check before each season saves you time and money in the long run.
Do you keep a maintenance log for your tools? If not, give it a try and see how much easier it is to spot trends.
Your washer will thank you—so why not make it a habit?
Recommended Products

1500 PSI Max Pressure

210cc Powerease Engine
Maximum Volume (GPM) 4.5/5.6
Fuel Management: Fresh Fuel, Stabilizer, and Filter Care
Ever notice how a dull‑sounding pump can ruin a whole day of work? It usually comes down to the fuel you’re feeding it. I keep the tank full of fresh, low‑sulphur gasoline and steer clear of any gas that’s been sitting longer than a month—stale fuel cuts combustion and can eat away at metal parts.
Fuel stabilizer
Adding a stabilizer before you store the machine creates a protective film that stops oxidation. It also grabs water moleculess so ethanol won’t pull them into the system and cause corrosion.
Filter care
Swap out the fuel filter after about two hundred hours of run time. Give it a quick look for clogs and clean the screen so the flow stays steady.
Storage tip
Store the washer in a cool, dry spot and seal the tank tightly with the cap. That keeps dust and moisture out, which helps the engine stay reliable longer.
Quick checklist
- Fill with fresh, low‑sulphur gas.
- Add stabilizer before storage.
- Replace filter every 200 hours.
- Keep the tank sealed in a cool, dry place.
Frankly, these simple steps add up to a big boost in engine life and keep pressure output steady. Worth knowing: a little routine now saves you costly repairs later.
Give it a try and see how much smoother your machine runs. Got any other fuel‑care tricks that work for you?
Recommended Products

Set of 4 Shocks & One Steering Stabilizer - compatible with Vehicles 4-6" Front Lift and 4" Rear Lift

Part Number 985-24-076
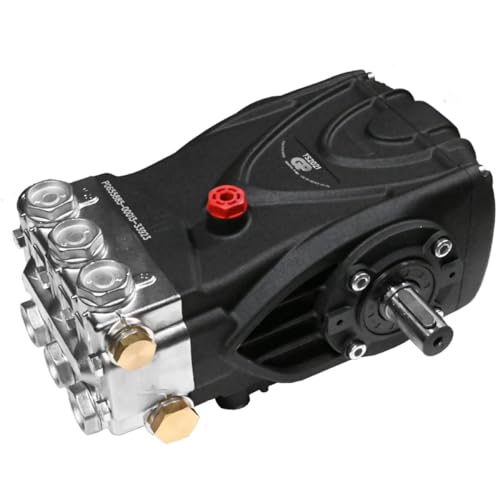
Pump Care: Oil, Noise Reduction, and Vibration Monitoring
Ever noticed that weird clunk when your washer starts up? It’s usually the pump trying to tell you something’s off. Here’s the trick: check the oil level every month and top it up with the grade the maker recommends before you run a load. After each oil change, tighten the mounting bolts—those little shifts can turn into noisy vibrations. Then grab a clean rag and give the seal a quick swab to clear out any debris that might leak.
When the washer is running, listen for rattles, whines, or grinding. Those sounds often point to worn bearings or not lubrication. Feel the housing with your hand; a steady hum means the pump’s balanced, but a thumping pulse hints at a loose mount or a bad seal. If the vibration feels stronger than the test data threshold, re‑align the brackets, replace the seal, and double‑check the oil.
Frankly, keeping a regular routine cuts down wear and keeps your washer humming along longer. Worth knowing: a quick hand‑check can save you a costly repair later.
Got any other pump quirks you’ve wrestled with? Let’s swap tips and keep those machines running smooth.
Recommended Products

FRAME: All Welded, Powder Coated, 12 Gauge Bent Steel Roll Cage, 3/4" Threaded Axles Welded to the Frame, Lifting Bar, 13" Pneumatic Wheels Attached with Lock Nuts, 10 Gallon Poly Fuel Tank, Hose Reel Mounting Plate

Professional Performance: Easy-to-assemble and easy-to-start with its Honda GX390 commercial series engine, the Water Blaster Series power washer is great for contractors who specialize in deck cleaning, wood restoration, and all professional services

Heavy-duty H-frame constructed of high-grade steel and built to exacting standards for quality and durability
Pressure Washer Electrical Safety Checklist
Ever wonder why your pressure washer sometimes fizzles out or sparks when you plug it in? It’s usually something simple you missed before you hit the switch.
First, give the power cord a quick once‑over. Look for any cuts, frayed spots, or bent prongs. The plug should sit snugly in the outlet—no wiggle room. Check that the outlet supplies the right voltage; a mismatch can fry the motor or give you a nasty shock. Make sure the cord’s gauge matches the washer’s amperage rating, and verify the outlet is properly grounded.
Fair warning: a bad ground can bypass all the safety features. Grab a calibrated tester and run a quick ground‑fault check. If the tester lights up, you’ve got a problem that needs fixing before you power up.
Here’s the trick: keep the control panel dry and stay away from extension cords longer than the manufacturer recommends. Over‑extending can cause voltage drops and overheating. Replace any worn connectors right away—don’t wait for them to break.
Worth knowing: the built‑in arc‑suppression circuit does a lot of heavy lifting by taming voltage spikes that could otherwise damage the motor. A quick visual check to the circuit’s indicator light (if your model has one) can tell you if it’s still alive.
- Inspect cord for frays, confirm gauge matches amperage, ensure outlet is grounded.
- Test for ground faults with a calibrated tester; replace any worn connectors promptly.
Follow these steps, and you’ll keep your washer humming along without nasty surprises. Ready to give your setup a quick safety audit?
Store and Restart the Washer Safely for Long‑Term Use
Ever wonder why your washer refuses to start after a winter break? It’s usually because the old fuel and moisture have taken a toll. I’ve learned a few tricks that keep the machine happy for years.
Empty the tank and add a stabilizer
First, drain the fuel completely. Pour in a fuel stabilizer, then let the engine run until it quits on its own. This clears the carburetor and stops any gumming that could clog the system later.
Take care of the battery
Disconnect the battery and store it in a cool, dry spot. A simple trick is to wrap it in a cloth that breathes—no plastic bags that trap humidity.
Cover the whole unit
Wrap the washer in a breathable cover. This lets any stray moisture escape while keeping dust out. It’s a cheap way to protect the seals and metal parts.
When you’re ready to fire it up again
Reconnect the battery, reinstall the fuel filter, and give the hoses a quick visual check for cracks or loose fittings. Run the pump for a couple of minutes without detergent; if the pressure feels right, you’re good to go. Finally, look at the nozzle and clear any clogs you see.
Worth knowing:
- Keep the storage area cool and dry—no attic heat spikes.
- Check the fuel filter before each season; it’s cheap and saves headaches.
Try this:
Run the pump for two minutes with clean water before adding detergent. It’s a quick sanity check that the pressure system is still solid.
Following these steps should give you a reliable startup and add years to your washer’s life. Got any other storage tips you swear by?
Troubleshoot Maintenance‑Related Issues After Skipping Steps
Ever noticed your pump getting weird and the pressure dropping after you skip a maintenance step? It’s a common hassle, but you can sort it out without a full teardown.
First, check the water flow. A steady stream tells you the pump’s still moving water, while a drop can point to a clogged filter or a worn seal. Listen for any whine or rattling—those sounds often mean the pump’s working harder than it should.
Next, look at the pressure gauge. If the needle dips sharply after a wash, it’s a good clue that a seal might be leaking water into the motor housing. That can cause overheating fast, so don’t ignore it.
Try this:
- Verify hose connections are tight and free of cracks.
- Inspect the nozzle for blockages that could mimic a seal problem.
- Check the fuel filter condition; a dirty filter can also lower pressure.
When I find a faulty seal, I swap it out with the manufacturer‑approved part and give the moving pieces a fresh coat of lubricant. After that, I run the pump again and watch the pressure gauge to make sure it stays steady.
If the pressure still isn’t right, go back and double‑check the filter cleaning schedule and the oil change intervals. Skipping those can wear down components early, and the symptoms look a lot like a seal failure.
Fair warning: Ignoring a small leak can lead to bigger damage down the line, so catch it early. Once everything’s back to normal, you’ll notice the pump runs smoother and the pressure holds steady.
Got any other tricks that have helped you keep your pump humming? Let’s hear them.
Frequently Asked Questions
Can I Use a Garden Hose for Pressure Washer Water Intake?
I’d say yes, but only with the proper hose adapters and a clean intake filter. Use a garden hose, attach the adapter securely, and make certain the filter stays unclogged to protect the pump.
How Often Should I Replace the Fuel Stabilizer?
I replace the fuel stabilizer every six months, because its shelf life drops quickly after opening; that frequency keeps my pressure washer running smoothly and avoids fuel‑related issues.
Is It Safe to Operate the Washer in Humid Conditions?
I say it’s safe if you keep electrical safety top of mind—seal connections, ground properly, and dry everything—while also watching for corrosion prevention by wiping down metal parts and storing the washer in a ventilated, low‑humidity area.
What Temperature Range Is Ideal for Storing the Washer?
I picture my washer tucked in a Victorian cellar, and I tell you: store it between 50‑70°F (10‑21°C) for peak temps, and add a light coat of oil for frost prevention.
Do I Need to Inspect the Pressure Gauge Regularly?
Yes, I always check the gauge’s calibration before each big job and replace the battery when it starts to sag, ensuring accurate pressure readings and reliable performance every time.