As an Amazon Associate, we earn from qualifying purchases. Some links on this site are affiliate links at no extra cost to you. Our recommendations are based on thorough research and editorial judgment.
Hose, Pump, or Nozzle? How to Track Down a Weak Spray Issue
I start by checking the suction hose for kinks, cracks, or sagging that could trap air, then I run water through it upright to confirm it stays full; if the hose looks good, I prime the pump by filling the suction line with water, listen for dry‑running sounds, and verify the inlet screen is clean and uncracked; next I remove the nozzle tip, inspect the orifice for wear, measure its width against specs, and make certain the tip seats squarely; finally I compare the pressure gauge reading to the regulator set point, tighten any loose clamps, and apply a soap‑water test to locate leaks. If you follow these steps, the next section will show you how to keep the system reliable.
Key Takeaways
- Inspect hoses for kinks, sagging, or cracks; lift and run water to ensure no air pockets or leaks.
- Prime the pump by filling the suction line with water and listen for dry‑running sounds at the inlet.
- Examine the nozzle tip and orifice for sediment, wear, or mis‑alignment; measure orifice size against specifications.
- Check filters and strainers for blockage; replace dark or warped elements and back‑flush strainers before reinstalling.
- Perform a soap‑water leak test on all connections, tighten loose clamps, and record pressure readings after each adjustment.
Diagnose the Weak Spray: Quick Visual Checks Before Disassembly
Ever had your garden hose sputter out just as you’re trying to finish the last row of tomatoes? A weak spray can be frustrating, but you can often spot the problem before you have to take anything apart.
First, take a quick look at the hose, pump, and nozzle as a simple chain. A kink in the hose, a loose fitting, or a droplet at a joint usually points to the culprit. Check for any bends, cracks, or worn clamps, and give the line a gentle squeeze to feel for pressure drops. Make sure each connector clicks firmly into place—nothing should feel loose.
Next, examine the hose for sagging that could trap air bubbles. If the hose is drooping, lift it a bit and see if the spray steadies. Then, turn your attention to the pump’s inlet. Look for signs of dry running, like a whirring sound without water. A dry inlet often means the pump isn’t getting enough flow, which can cause a weak spray.
Now, focus on the nozzle. Hold it up to the light and watch the spray pattern. If you see an irregular shape or a single droplet forming, the nozzle may be clogged or worn out. A quick rinse with warm water can sometimes clear the blockage, but if the spray still looks off, it’s probably time for a replacement.
Frankly, these visual checks usually pinpoint the issue fast, letting you decide whether to tighten a clamp, replace a worn hose, or clean the nozzle. Try this: after you’ve tightened everything, run water for a minute to let any trapped air escape, then re‑check the spray.
If you’re still seeing a weak stream after these steps, it might be a deeper pump problem that needs professional attention.
Got any other quick‑fix tips for weak sprays? Share them below!
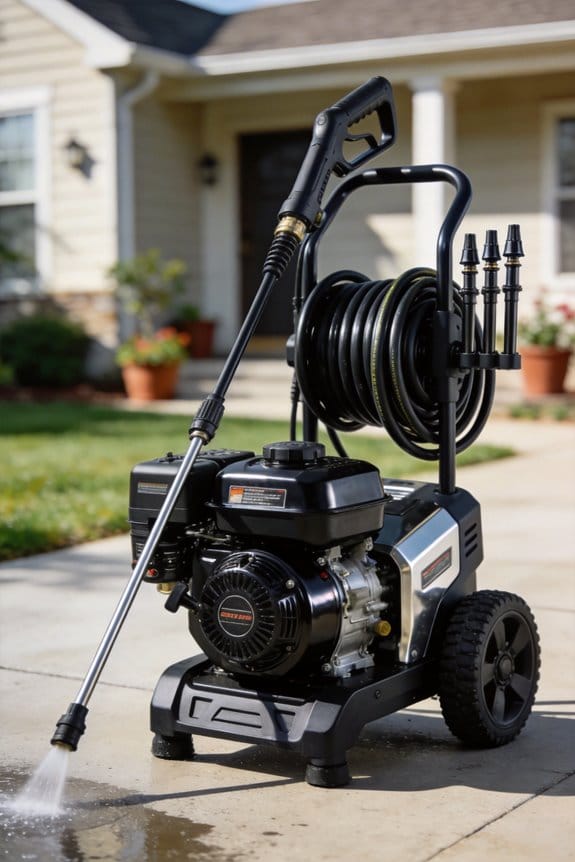
Inspect the Suction Hose for Blockages That Cause Weak Spray
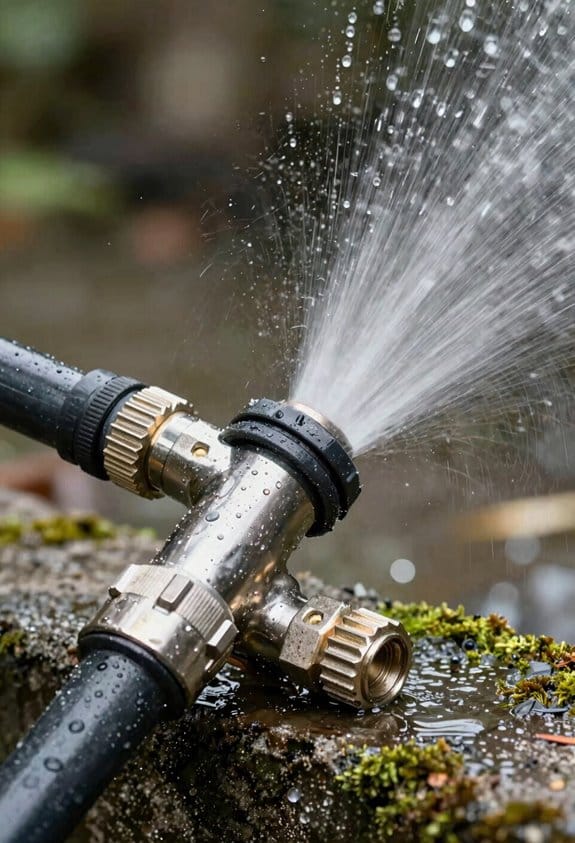
Ever notice your pressure washer’s spray turning into a weak mist? That usually means something’s choking the suction hose.
First, pull the hose off the tank and give it a good look inside. You’ll want to spot any dirt, sand, or a section that’s collapsed. Run water through the hose while you hold it upright—if the water pools, the hose is sagging and needs fixing.
Fair warning: a busted coil or plastic skeleton can let the hose buckle under vacuum. If the reinforcement looks worn, swap it out for a reinforced hose that matches your system’s pressure rating.
Try this: after you’ve cleared or replaced the hose, re‑attach it tightly, tighten all fittings, and check for any air leaks before you fire up the spray again.
If you keep an eye on the hose’s condition, you’ll avoid those frustrating weak‑spray moments and keep your cleaning jobs moving smoothly. Ready to give it a quick check?
Recommended Products

FAST PUMPING RATE - Flows up to 7 Gallons per Minute (26.9 Liters per Minute) with the Included 6.6FT (79 inch ) Discharge Hose makes pumping long distances a breeze - Discharge Hose is made of 4 layers with oil & flame resistant, cold weather resistant, high grade polyester yarn reinforcement with flexible construction

Clear PVC with white helix with smooth interior wall
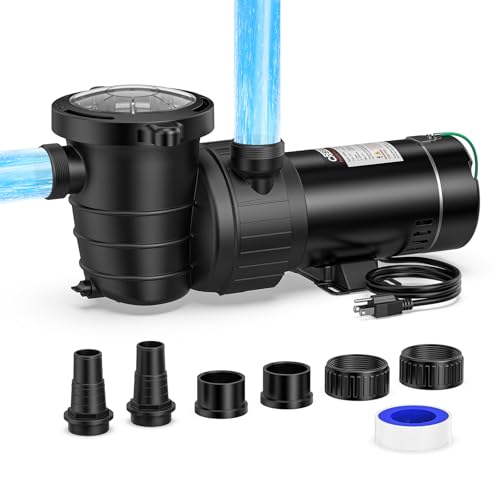
【Powerful 1.5 HP Copper Motor 】 CrestWave’s above ground pool pump features a self-priming, Single Speed (115V 60hz) pure copper motor. Delivers 5706 GPH flow and 50ft max head for crystal-clear water. IPX5 waterproof + quiet built-in airflow design ensures energy-efficient and reliable for above-ground pools and spas of all types & sizes
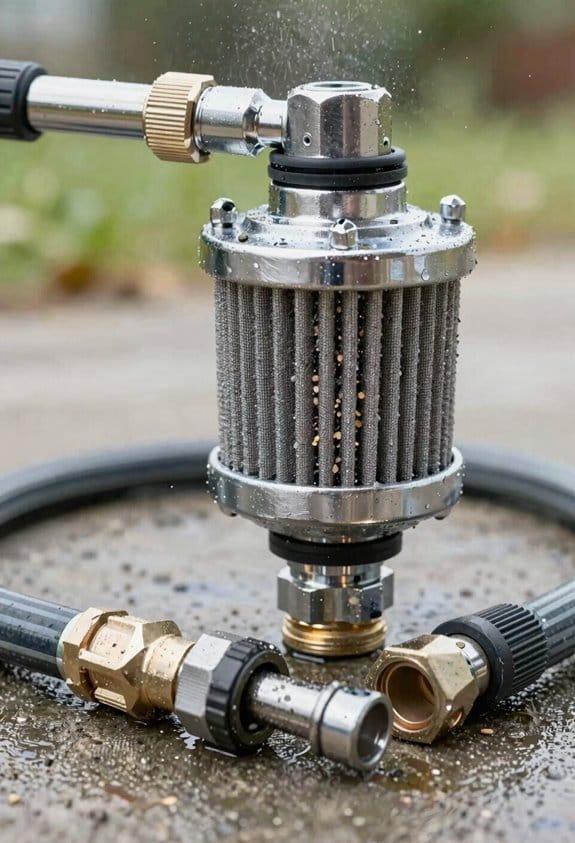
Prime the Pump and Test Its Inlet Screen to Restore Weak Spray Power

Ever notice how your garden hose turns into a sad mist instead of a strong spray? That usually means the pump isn’t primed and the inlet screen is choking the flow. First, unplug the pump, pull off the screen, and give it a good rinse with clean water until the water runs steady and clear. Slip the screen back on, make sure the hose is fully submerged, and fire the pump for a few seconds to see if the pressure hits the PSI your manual says.
Frankly, a quick manual priming step can save you a lot of hassle. Fill the suction line with water before you start the motor—this pushes out any air bubbles that would otherwise mess with the flow. While you’re at it, give the inlet a close look for cracks, rust, or any buildup that could block the water.
Worth knowing: if the screen looks worn, replace it with a new one that matches the size spec. After you put everything back together, run the pump for about two minutes and keep an eye on the pressure gauge. You want a steady reading, not a wobble.
Here’s the trick: after the pump runs a short while, check that the hose stays fully submerged. If the pressure builds up nicely, you’re good to go; if it drops, double‑check the screen and the suction line for any hidden debris.
If you follow these steps, the spray will bounce back to full power and you won’t keep dealing with that weak‑misty spray. Ready to give your pump a fresh start?
Recommended Products

Made for Industry: The Macnaught 120v C1D1, 20 GPM rotary vane transfer pump features an expendable 36 inch length steel suction pipe, auto shut-off nozzle and fuel rated anti static hose. Weighing just 40 lbs, this fuel transfer pump is easily portable between work sites.

Wide mouth oil reservoir port for easier, cleaner filling. Doubles as pump exhaust; threaded to attach garden hose for exhausting to remote location

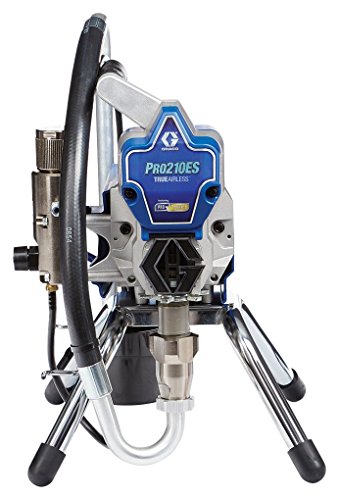
Product 1: CONTROL PAINT FLOW: Fully adjustable pressure to give you ultimate control of paint flow for any project size; RAC IV SwitchTip allows you to reverse the tip when clogged to keep you spraying
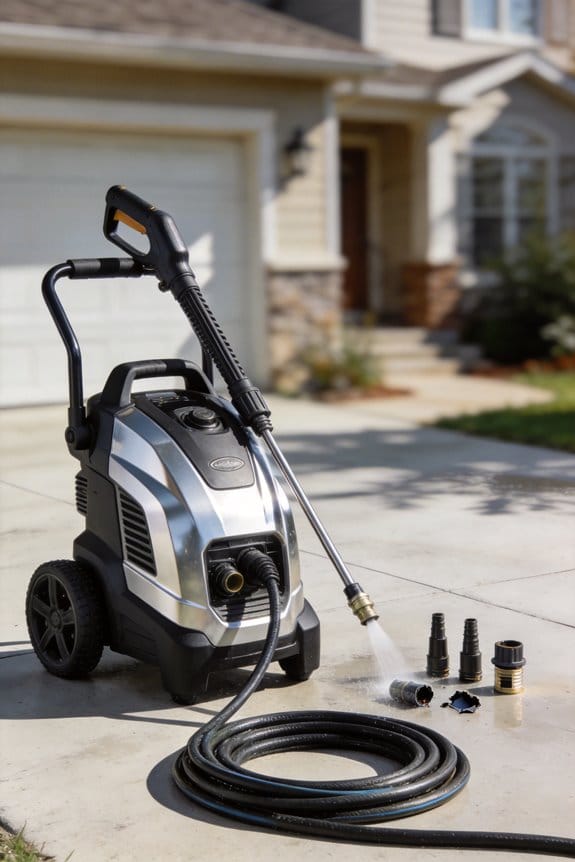
Examine Nozzle Orifice and Alignment for Weak Spray Issues
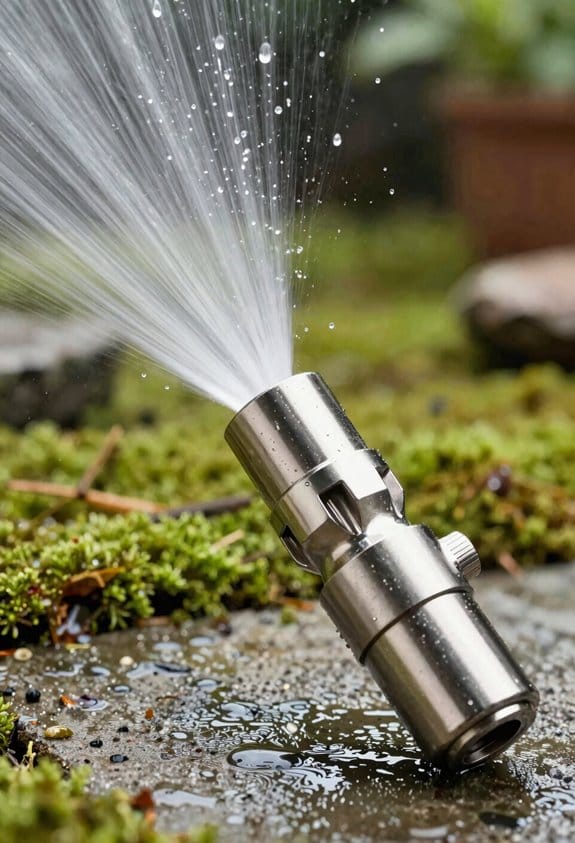
Ever noticed your spray losing power right after you turn it on? It’s usually not the pump at all—most of the time the nozzle’s the culprit.
I start every spray check by pulling off the tip and holding it up to the light. Look for any sediment or wear that might be blocking the opening. If the orifice looks a bit off, measure its width and compare it to what the maker says it should be. A mis‑aligned or oversized hole can drop spray pressure by up to 40 % and give you uneven coverage.
Worth knowing:
- Remove the tip and inspect it under a bright light.
- Measure the opening and check it against the spec.
- Replace the tip if it’s damaged, making sure it seats squarely.
When you swap out a bad tip, the flow path straightens and the spray regains its strength. You’ll see better atomization and a more consistent pattern without having to mess with the pump.
Fair warning: Skipping this step can lead to weak spray patterns that waste both time and product. Give the nozzle a quick once and you’ll likely solve the problem before you even think about other fixes.
Got a stubborn spray? Try this: replace the tip and double‑check the alignment. You’ll notice the difference right away.
Want smoother, stronger spray every time? Give the nozzle a thorough look first.
Recommended Products
Designed for Property Maintenance Pros, and Pro Painters who need the highest power and performance


CLASS-A FIRE RATED & HIGH-EFFICIENCY INSULATION: Kraken Bond Spray Foam Insulation Kit is Class-A Fire Rated and meets fire safety standards, including ASTM E84, ensuring enhanced fire resistance for safer applications. It also delivers superior thermal performance (R-Value 5.66/inch) and acoustic insulation, making it ideal for attics, walls, and crawl spaces—perfect for both DIYers and professionals seeking reliable, safe results.
Verify Filters and Strainers Are Clean to Prevent Weak Spray
Ever notice your spray losing power even after you’ve checked the nozzle? It’s usually the filters and strainers that are the hidden culprits.
First, pull out each filter housing and take a look at the element. Compare what you see to the manufacturer’s micron rating—most spray systems work well with a 5‑micron filter. If the filter looks dark, warped, or torn, swap it out right away and jot down the date so you know when the next service is due.
Next up, check the strainers for any sludge that might be hanging around. A gentle back‑flush with clean water usually does the trick before you put everything back together.
Try this:
- Inspect every filter housing and compare the element to the micron rating.
- Replace any filter that looks dirty, warped, or torn and note the date.
- Back‑flush strainers with clean water before reinstalling.
A regular cleaning schedule—about every 10‑15 operational hours—keeps buildup at bay, helps the pump stay efficient, and gets your spray back to a steady flow without extra tweaks.
Frankly, a quick glance at those parts can save you a lot of hassle later on.
Recommended Products

ONE GUN FOR ALL PAINT SPRAY NEEDS – 3M Accuspray handheld HVLP paint gun works with PPS 2. 0 disposable lids, liners and nozzles to measure, mix, filter and spray a variety of paint materials
KIT INCLUDES: 1 Spray Gun, 6 Gravity Atomizing Heads, 6 Pressure Atomizing Heads, 1 Locking Collar, 1 Pressure Whip, 1 Air Control Valve, 1 PPS 2.0 Standard Size Mixing Cup with 5 Liners and 5 Lids, 3 Sealing Plugs
Natural alkaline water, rich in antioxidant hydrogen, and proven to remove 99% of over 220 water contaminants.
Check Pressure Readings and Troubleshoot Regulator Settings When Spray Is Weak
Ever noticed your spray turning into a dribble? That usually means the regulator isn’t holding the right pressure. First, grab the gauge and watch it while the system runs. If the needle drops below the manufacturer’s psi, note the exact number and compare it to the regulator’s set point.
Try this: loosen the adjustment screw a bit, then turn it clockwise until the gauge matches the spec. Once it’s right, lock the knob in place. While you’re at it, give the regulator’s spring a quick feel—make sure it’s still springy—and check that the diaphragm moves freely. A stuck diaphragm can make the spray jumpy.
Run a short test spray after the adjustment. Watch the spray pattern and listen for any hiccups. If the spray looks steady, do another gauge check to confirm the pressure stays stable throughout the run.
If the pressure still feels off, double‑check the connections for leaks and make sure the hose isn’t kinked. A small leak can pull the pressure down fast, leaving you with a weak spray.
Finally, give the whole system a quick run‑through. Keep an eye on the gauge and the spray consistency. When everything stays steady, you’ve got the regulator back on track.
Got any other spray issues you’re wrestling with? Let’s hear them.
Recommended Products

POWERFUL HONDA GX160 ENGINE FOR RELIABLE, ALL-DAY PERFORMANCE The 160cc Honda GX160 engine delivers dependable power with low noise, reduced vibration, lower emissions, and excellent fuel economy, plus a built-in low-oil shutdown to protect the engine and extend its working life.

4 roller, 7 GPM pump with adjustable pressure (up to 150 PSI) and dependable 160cc Honda GX160 engine

13.4 CFM at 40 psi and 11.5 CFM at 90 psi
Leak‑Test Every Connection and Gasket to Eliminate Air Intrusion
Ever notice your spray gun losing power mid‑job? It’s usually air sneaking in somewhere along the line. First, pressurize the hose to its normal psi and coat every joint, gasket, and hose connection with a soapy‑water mix. Watch for bubbles—those little puffs are the tell‑tale signs of a leak.
Next, run an air diagnostic on each fitting. Tighten any loose clamps and keep an eye out for persistent bubbling. When a gasket shows even a hint of seepage, swap it out right away; worn seals love to let air slip through unnoticed.
Make sure every connection is snug, hose ends are fully seated, and tubing has no cracks. After you replace a part, repeat the soap test to confirm the leak’s gone. This step‑by‑step routine gets rid of air intrusion, steadies pressure, and keeps your spray performance solid.
Try this:
- Pressurize the line, then apply soap solution.
- Tighten loose clamps and note any bubbling.
- Replace any gasket that shows seepage, then retest.
Worth knowing:
- A fully seated hose end prevents hidden gaps.
- Checking for cracks in tubing saves you from future headaches.
Following this method will have your system running smoothly again. Ready to give it a go?
Schedule Preventive Maintenance to Keep Spray Power Consistent
Ever noticed how a sudden dip in spray power can ruin a whole project? It’s frustrating, especially when you’ve already sealed every joint and checked for air bubbles. The good news is that a simple, regular maintenance routine can keep your spray system humming smoothly.
Weekly checks
- Look over hoses for cracks or kinks.
- Clean the filter to stop clogs before they affect pressure.
Monthly cleanings
- Remove built‑up residue from the pump and nozzle.
- Wipe down all connections to keep them tight and leak‑free.
Quarterly part swaps
- Replace pump seals, gaskets, and reinforcement coils on schedule.
- Swap out nozzle orifices that show wear, noting the part numbers for future orders.
I keep a spreadsheet where I log each task, the date, and any pressure readings I take. After every service I test the pressure and compare it to the baseline data I recorded when the system was brand new. If the reading drifts more than five percent, I tweak the schedule right away. This habit has saved me from surprise failures and helped the equipment last much longer.
Your component inventory should be a living document. Track hoses, filters, pump seals, and nozzle orifices, and make sure you have spare gaskets and reinforcement coils on hand. When you notice a part wearing down, you can swap it out before it causes a pressure drop.
Try this:
- Set a reminder on your phone for each weekly, monthly, and quarterly task.
- Use a simple table in your spreadsheet: Task | Date | Pressure Reading | Notes.
By logging everything and watching the pressure numbers, you’ll spot trends early. If you see a consistent dip, you can adjust the cleaning frequency or replace a part sooner than planned.
Frankly, the routine isn’t fancy, but it works. You’ll spend a few minutes each week instead of dealing with a costly breakdown later. Have you tried a similar schedule for your spray gear? Let’s keep the power steady together.
Frequently Asked Questions
How Does Ambient Temperature Affect Spray Strength?
I’ve found that ambient temperature changes spray viscosity; colder air thickens the fluid, reducing atomization and pressure, while warmer temperatures thin it, letting the spray travel farther and hit harder.
Can Water Hardness Damage the Pump Over Time?
I’ve seen water hardness cause scale buildup inside the pump, which leads to mineral abrasion on moving parts and eventually reduces efficiency, so yes, it can damage the pump over time.
Why Does Spray Weaken After Prolonged Operation?
I’ve noticed the spray thins because worn seals let air slip in and a clogged filter starves the pump, so pressure drops and the mist loses its punch.
Do Different Liquids Require Separate Nozzle Types?
I’d tell you that different liquids usually need separate nozzles; you must match viscosity and guarantee chemical compatibility, otherwise spray patterns suffer and clogging risk rises dramatically.
Is a Voltage Drop Causing Intermittent Spray Power?
I’ve seen a 30 % drop in spray power when voltage dips; yes, a voltage drop can cause intermittent spray. Check electrical resistance and wiring degradation, because weak connections often spark those failures.