As an Amazon Associate, we earn from qualifying purchases. Some links on this site are affiliate links at no extra cost to you. Our recommendations are based on thorough research and editorial judgment.
What to Know About PSI and GPM on Electric Pressure Washers
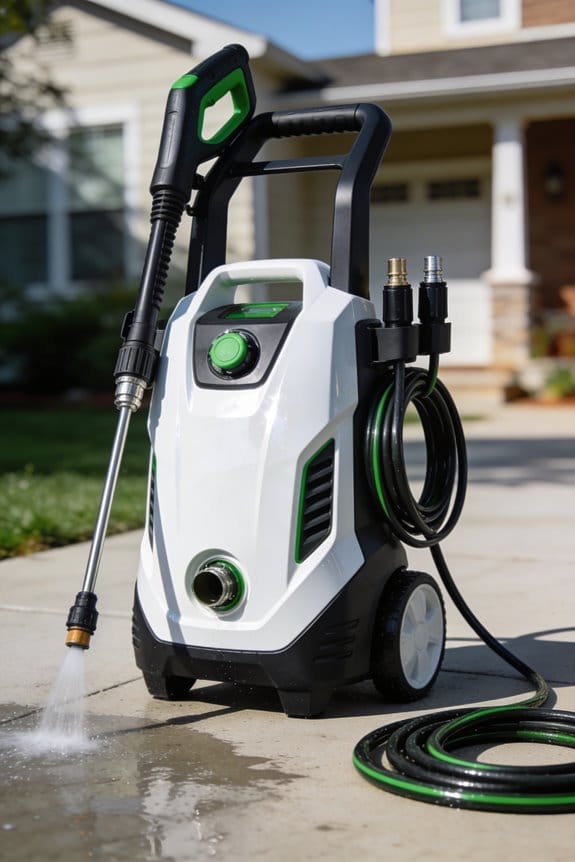
I’m a pressure‑washer pro who’ll tell you that PSI gives the force, GPM supplies the water volume, and together they set cleaning power and speed; a typical electric unit caps around 1,300 PSI to protect the motor, while 1.5–2.5 GPM lets you cover decks, siding, or cars without gouging paint or wood, and a wider‑angle nozzle spreads impact on delicate surfaces. Use higher GPM for large, loose debris and higher PSI for stubborn grime, and always test a small spot before full‑scale work; the next sections will show you how to balance these numbers for any job.
Key Takeaways
- PSI determines cleaning force; higher PSI removes stubborn grime but can damage delicate surfaces if too high.
- GPM controls water volume and coverage; higher GPM cleans larger areas faster and reduces rinsing passes.
- Ideal electric washer settings balance PSI and GPM: 1,200‑1,500 PSI with 1.5‑2.5 GPM for most residential jobs.
- Use wider‑angle nozzles for low‑PSI, high‑GPM cleaning of soft materials; narrow nozzles for high‑PSI, low‑GPM spot cleaning.
- Keep hose length under 50 ft to prevent pressure loss and maintain consistent PSI/GPM performance.
What Pressure‑Washer PSI and GPM Do You Need for Your Project?
Ever felt stuck trying to pick the right pressure washer for a home project? You’re not alone—many DIYers get tangled up in PSI and GPM specs before they even start cleaning. The key is to match the machine to the surface, the grime, and how fast you want the job done.
First, think about what you’re cleaning. For delicate paint or soft wood, stay under 1500 PSI and go with a 1.5 GPM unit. A narrow nozzle helps keep the spray gentle, so you won’t strip away the finish. If you’re tackling concrete, a driveway, or a stubborn oil stain, crank the PSI up to 2500–3000 and pair it with a 2.5 GPM pump. A wider nozzle spreads the water out, covering more ground without missing spots.
Fair warning: always check that the detergent you plan to use won’t eat away at seals or hoses. A quick test on a small patch can save you from costly damage later. Also, keep your hose under 50 ft; longer runs drop pressure and make the job harder.
Try this: start with a low‑pressure setting, scrub a corner, then bump up the PSI if the dirt won’t budge. This step‑by‑step approach lets you find the sweet spot between power and safety without guessing.
- Assess surface prep needs first.
- Match PSI to cleaning intensity.
- Pair GPM with rinsing speed.
- Choose nozzle size based on material.
- Verify chemical compatibility.
- Keep hose length under 50 ft.
- Test on a small area before full‑scale work.
How GPM Impacts Rinsing Speed and Coverage
Ever noticed how a slow rinse can turn a quick clean into a marathon? When you crank up the gallons‑per‑minute (GPM) on your pressure washer, the water hits the surface faster and spreads farther, especially if you’re using a wide‑angle nozzle.
Frankly, a 3 GPM unit will clear a 10‑square‑foot patio in about half the time it takes a 1.5 GPM model—provided the PSI and nozzle stay the same. That’s why matching GPM to the job size matters.
Worth knowing:
- 2–3 GPM works well for small decks.
- 4–5 GPM handles larger driveways.
- 6 GPM+ is best for commercial siding.
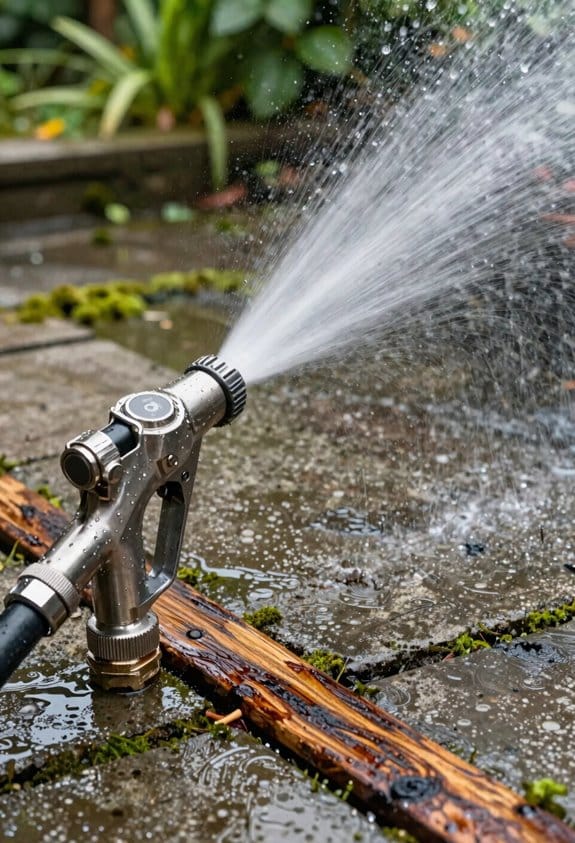
Choosing the right nozzle is key. A fan spray on a high‑GPM machine spreads water evenly, cuts down on streaks, and means you won’t need as many passes.
If you’re wondering whether to upgrade, think about the surface you’re tackling. Bigger areas and tougher grime benefit from higher flow, but you still want to keep water use sensible.
Try this: start with a fan spray, watch how the water fans out, and adjust the GPM until the rinsing feels quick but not wasteful.
Balancing flow and spray gives you a fast, thorough clean while keeping water consumption in check.
Ready to give your next project a smoother, quicker rinse?
Calculating Cleaning Units (CU) to Compare Washers
Ever wondered why some pressure washers clean faster even though they don’t have the highest PSI?
The trick is to look at cleaning units (CU), which you get by multiplying the washer’s PSI by its GPM. That single number captures both pressure and flow, so you can compare models quickly and objectively.
I use CU to rank washers, noting that a higher CU often means better nozzle efficiency and faster rinsing, but it also signals greater energy consumption. For example, a 1800 PSI × 2.0 GPM unit hits 3600 CU, while a 1500 PSI × 2.5 GPM unit reaches 3750 CU. The latter edges out the former in CU despite lower pressure because of the higher flow.
Fair warning: picking a washer with a CU that’s too high for your job can jack up electricity costs and wear out parts faster.
Here’s the trick: match the CU to your cleaning load while staying inside your power budget.
What to check when you shop
- Your typical cleaning tasks (light car wash vs. heavy-duty deck)
- The power source you have (120 V vs. 240 V)
- How often you’ll run the machine
Quick comparison
- 1800 PSI × 2.0 GPM = 3600 CU (good for moderate jobs)
- 1500 PSI × 2.5 GPM = 3750 CU (better for larger areas)
If you’re balancing speed and cost, aim for a CU that meets your workload without pushing your electricity bill through the roof. Which CU range feels right for your next project?
Why Most Electric Washers Cap at 1,300 PSI
Ever noticed how your electric pressure washer never seems to hit the same pressure as the gas‑powered ones? That’s because the motor’s voltage and current are limited, so the pressure tops out around 1,300 PSI. When you push it higher, the motor heats up fast enough to breach safe temps, and the wiring or switches could fry. Designers therefore set a hard cap to keep the heat in check and protect the components.
Worth knowing:
- The 1,300 PSI limit gives you solid cleaning power without sending the motor into a thermal overload.
- Staying in this range helps the washer run smoothly for years, avoiding sudden spikes that wear out parts.
If you’re buying a new unit for home use, pick one that stays near that 1,300 PSI mark. Going beyond it can cause overheating, drop efficiency, and even early failure. Test data shows electric models keep a steady pressure when they’re capped at that level, so you get reliable performance without the risk of a hot‑wire nightmare.
Frankly, you’ll find that most consumer‑grade washers are already tuned to this sweet spot, balancing clean results with manageable heat. That means you don’t have to worry about temperature spikes that could shorten the life of your machine.
Try this: check the spec sheet for the max PSI rating and make sure it’s close to 1,300 PSI. If it’s much higher, the manufacturer might be pushing the motor beyond what the wiring can safely handle.
Keeping the pressure within the recommended range lets you clean your driveway, deck, or car efficiently while protecting the pump and motor. You’ll end up with a tool that works hard when you need it and lasts longer than a cheaper, over‑stressed model.
Choosing the Right PSI for Cars, Decks, and Siding

Ever wonder why your car’s paint looks great after a wash but the deck still has stubborn stains? The trick is matching the pressure to each surface’s strength and the job’s intensity. For cars, aim for 1,200–1,800 PSI and grab a 25‑degree nozzle; it’s gentle enough to protect the finish while kicking out grime. Decks do well with 800–1,500 PSI and a 40‑degree nozzle, which gives enough power without splintering the wood. Siding needs the lowest pressure—usually 100–800 PSI—paired with a 65‑degree nozzle to keep the material from eroding.
Try this:
- Start at the low end of the range and increase by 100 PSI steps.
- Test a small spot first; look for streaks or any sign of damage.
- If everything looks good, move on to the rest of the surface.
Frankly, adjusting the pressure in small increments saves you from costly repairs. When you see the water wash away dirt without leaving marks, you’ll know you’ve hit the sweet spot. The same idea works for any outdoor project: start low, watch the results, then fine‑tune.
If you’re not sure which nozzle to pick, remember that a tighter angle (like 25 degrees) concentrates the spray, while a wider angle (like 65 degrees) spreads it out. That’s why a 25‑degree nozzle is perfect for cars, a 40‑degree for decks, and a 65‑degree for siding. Each one balances cleaning power with material safety.
You’ll also want to keep an eye on the hose length and pump capacity; a weak pump can’t maintain the right PSI over a long hose, leading to uneven cleaning. A short hose and a strong pump give you consistent pressure, especially on larger decks or houses.
Give it a go and see how the right pressure makes a difference. Ready to try these settings on your next cleaning day?
Selecting Ideal GPM for Large‑Area or Heavy‑Debris Cleaning
Ever tried scrubbing a huge patio and felt like you were just moving dirt around? You’re not alone—big decks, driveways, and mud‑covered patios need more than just a little pressure. The trick is getting the right flow so you finish faster and don’t end up with a mess of re‑deposited grit.
What to look for
- Start with at least 3.5 GPM for big areas. It cuts the number of passes you need and keeps dirt from settling back.
- Pair a 4‑GPM pump with a 25‑degree nozzle for a good mix of pressure and coverage. If the debris is really stubborn, bump up to 5 GPM and use a 15‑degree nozzle. You’ll get stronger flushing without losing control.
- Test the setup on a short strip before you go full‑scale. That way you can tweak the flow based on how porous the surface is and how fast you want the rinse.
Frankly, a 4 GPM unit can clean a 400‑square‑foot deck in about half the time it takes a 2 GPM model, and you’ll still get similar cleaning results. The extra flow just means fewer trips back to the water source and less chance of spreading the mess.
Worth knowing: if you notice the water splashing too far, dial back the nozzle angle a notch. A tighter spray concentrates the power where you need it, while a wider angle works better for open, flat surfaces.
Try this: run the pump for a minute on a small patch, watch how quickly the dirt lifts, then adjust the nozzle until the spray looks even. When the water runs clear, you’ve hit the sweet spot.
Adjust the GPM as you go—more flow for porous concrete, less for smooth stone. A quick trial run will tell you if you need to step it up or down before tackling the whole area.
Got a big cleaning job coming up? Give the flow a quick test run and see how much time you can save.
How to Set and Adjust PSI/GPM on Your Pressure Washer
Ever tried to clean a deck and ended up with a spray that looks like a fog machine? That’s what happens when the pressure and flow aren’t set right.
When you first power up the unit, set the pressure regulator to the manufacturer‑recommended baseline—usually 1,200 PSI for residential electric models—then turn the flow control knob in tiny steps. Watch the gauge and listen for a steady hiss; a 1.5 GPM setting usually gives the best mix of cleaning power and water use for most decks and patios.
Try this: pick a nozzle that matches the job, and make sure its size lines up with the PSI/GPM combo so you don’t get an angry blast.
I always wear eye protection, keep the area clear, and double‑check the hose is snug before you crank anything up. The gauge should be your constant companion—turn the knob clockwise to raise pressure, counter‑clockwise to lower it. Stop when the spray feels steady and the surface reacts without splatter.
Fair warning: if you hear a sudden squeal or see the gauge jump, back off right away.
These safety steps and the right nozzle keep the washer efficient and your work zone safe.
Got a favorite nozzle for patios? Share it below.
Balancing PSI and GPM to Avoid Surface Damage
Ever tried cleaning a fresh‑painted deck and ended up with a peeled finish? That happens when the pressure’s too high and the flow’s too low. The spray can gouge paint, strip wood grain, or etch soft stone, so you’ll want a modest PSI paired with enough GPM to cushion the impact and spread the force evenly across the surface.
First, check how sensitive the material is. Delicate finishes need lower PSI and benefit from higher GPM to keep the water pressure steady. Then pick a nozzle with a broader spray angle; that cuts down point‑impact energy and spreads the flow.
Try this:
- Set the washer to a PSI range the material can handle—typically 800–1500 for wood and 100–300 for painted panels.
- Keep the GPM at 2.0–3.5 to guarantee adequate rinsing.
This balance prevents erosion, preserves texture, and delivers consistent cleaning results. You’ll notice the surface stays intact and the job finishes faster.
Fair warning: pushing the pressure too high while keeping the flow low will still gouge paint, strip wood grain, or etch soft stone. So, always match a modest PSI with enough GPM to cushion the impact and spread the force evenly across the surface.
Got a tricky surface you’re not sure how to tackle? Give these tips a try and see the difference for yourself.
Real‑World Scenarios: When Higher PSI Beats Higher GPM (and Vice Versa)
Ever tried cleaning a rusted fence and felt the pressure just wasn’t enough? You’re not alone. When the grime is tightly bonded, the key is a high‑PSI, low‑GPM washer that can punch through the paint’s hold. A 1500‑PSI model with a narrow nozzle does exactly that—its concentrated force breaks the bond fast, even if the flow isn’t huge.
Now picture a wide patio after a storm, covered in mud that’s barely clinging. Here a high‑GPM, modest‑PSI unit shines. A 2.5‑GPM washer at 1200 PSI with a wide‑angle nozzle rinses the mud away in far fewer passes. The bigger volume moves the debris, while the pressure is enough to lift the dirt without splattering.
Try this: keep the PSI high when you add steam cleaning. The pressure loosens the grime first, then the steam vapor softens it for a deeper clean. The right nozzle makes all the difference—too wide and you waste water, too narrow and you miss spots.
- Choose a narrow nozzle for stubborn, tightly‑bonded stains.
- Pick a wide‑angle nozzle for large, loosely‑stuck debris.
- Match PSI to the job: higher for breaking bonds, lower for rinsing.
Worth knowing: proper nozzle selection guarantees the right balance, preventing wild spray patterns while maximizing cleaning efficiency. You’ll end up with fewer passes, less water waste, and a cleaner surface every time.
Got a specific cleaning challenge? Let me know how you tackle it.
Decoding PSI, GPM, and CU Specs on Manufacturer Labels
Ever stared at a pressure washer label and felt lost? Those numbers—PSI, GPM, and CU—actually tell you a lot about what the machine can do, and decoding them is easier than you think.
First, check the PSI. That’s the pressure, and it shows how well the washer can tackle tough grime. If you’re dealing with oil stains on a driveway, you’ll want a higher PSI. Next, look at the GPM. That’s the flow rate, and it decides how many passes you’ll need. A higher GPM means you cover more ground faster, cutting down on work time. The CU, or cleaning units, comes from multiplying PSI by GPM. A 3000 PSI × 2 GPM washer hits 6000 CU, which is a solid balance of force and flow.
Worth knowing:
- Pick a nozzle that matches the specs. Narrow tips work best with high PSI, while wider tips suit higher GPM.
- Keep the machine in shape by scheduling maintenance after every 50‑hour run. Inspect hoses, seals, and the pump for wear so the rated numbers stay reliable.
Frankly, once you get the hang of these three numbers, you’ll pick the right washer for any job without guessing. Try this: write down the PSI and GPM you need for a particular task, then calculate the CU to see if the model fits your expectations.
Now you’ve got a quick way to match power, flow, and efficiency, so you won’t waste time or money on the wrong equipment. Ready to test it out on your next cleaning project?
Frequently Asked Questions
Can I Use a Higher‑Pressure Washer on a Low‑Pressure Nozzle?
I’d say no—using a higher‑pressure washer with a low‑pressure nozzle creates flow restrictions, breaking nozzle compatibility and risking damage, because the pressure exceeds what the nozzle can safely handle.
Do GPM Ratings Change With Different Hose Lengths?
I’d say yes—longer hoses increase hose resistance and create flow restriction, so the GPM rating drops noticeably as you add length, especially with thin‑walled tubing.
Is There a Safety Limit for PSI on Wooden Decks?
I recommend keeping PSI below 1500 on wooden decks; otherwise you risk driving water into wood moisture and causing rot. Use a low‑pressure cleaning technique, a wider spray tip, and keep the nozzle moving.
How Does Altitude Affect PSI and GPM Performance?
I picture thin mountain air pushing back, so altitude correction reduces your pressure and flow. Lower air density means the pump works harder, dropping PSI and GPM unless you compensate with a higher‑capacity unit.
Can I Mix Electric and Gas Units for Combined Cleaning Power?
I’d say you can’t safely mix electric compatibility and gas units; instead focus on power balancing by using a single system that matches the PSI and GPM you need for consistent, reliable cleaning.