As an Amazon Associate, we earn from qualifying purchases. Some links on this site are affiliate links at no extra cost to you. Our recommendations are based on thorough research and editorial judgment.

Matching Surface Cleaner Size to Your Pressure Washer’s PSI and GPM
I match a surface‑cleaner’s diameter to a pressure washer by multiplying the pump’s GPM rating by four inches, which gives the largest safe cleaner size; a 4‑GPM unit, for example, works best with a 16‑inch cleaner. Then I check the minimum PSI for that diameter—12‑inch needs at least 3,000 PSI, 14‑inch 3,500–4,000 PSI, and 18‑inch or larger 4,500 PSI or more. I also verify the washer’s duty level, ensuring light‑duty units stay under 12‑inch, medium‑duty under 15‑inch, and heavy‑duty can handle 20‑inch or larger. Finally, I confirm the connection type and run a low‑speed test for steady spray; if you keep reading you’ll see how to troubleshoot symptoms and choose the right wheel material.
Key Takeaways
- Use the “4‑inch‑per‑GPM” rule: multiply the washer’s GPM rating by 4 inches to determine the maximum safe cleaner diameter.
- Match minimum PSI to cleaner size: 12‑inch ≈ 3,000 PSI, 14‑inch ≈ 3,500–4,000 PSI, 18‑inch+ ≥ 4,500 PSI.
- Align washer duty level with diameter: light‑duty (<2,000 PSI, 1.5–2 GPM) → 10–12 in; medium‑duty (2,000–3,000 PSI, 2–3 GPM) → 12–15 in; heavy‑duty (>3,000 PSI, 3+ GPM) → 20 in+.
- Verify fit by hand‑spinning the brush; a steady, smooth spin indicates proper sizing and nozzle flow.
- After any swap, run a low‑speed test: look for consistent spray, cooler housing, and no pump hum or stuttering.
Calculate Surface‑Cleaner Diameter From GPM
Ever wondered why your surface‑cleaner seems too small or too big for your pressure washer? That mismatch can make the whole job feel like a waste of time.
I start by looking at the pump’s GPM rating and then multiply it by four inches. That quick math gives you the biggest cleaner you can safely hook up. Next, I check the washer’s flow rate—if the pump can push more water, you can go a bit larger without starving the nozzle. For instance, a 4 GPM pump works well with a 16‑inch cleaner, which many users find hits the sweet spot for medium‑duty jobs.
Frankly, the nozzle matters just as much as the size. Make sure its spray pattern spreads water evenly over the rotating brush; a bad nozzle can cause uneven pressure and wear out the brush fast. If you notice spots that stay dry, the nozzle’s likely the culprit.
Worth knowing: a clean, well‑matched nozzle helps the brush move smoothly and keeps the water pressure steady. That means you won’t have to stop and readjust as often, and the whole cleaning run stays efficient.
Here’s the trick: after you pick the right diameter, give the brush a quick spin by hand. If it feels wobbly, you probably need a tighter fit or a different nozzle. A solid, steady spin means you’re ready to tackle the job without fuss.
By following this simple calculation and checking the nozzle, you’ll avoid undersized or unwieldy cleaners, protect your equipment, and keep the cleaning performance consistent.
Ready to try it out on your next project?
Recommended Products

SIMPSON PRESSURE WASHER FOR PROFESSIONALS: The Simpson Aluminum Series gas power washer cleans decks, driveways, siding, fencing, equipment, and graffiti; The cold water machine is great for contractors; 49-State Compliant (Not for sale in California)


SIMPSON PRESSURE WASHER FOR PROFESSIONALS: The Simpson PowerShot gas power washer cleans decks, driveways, siding, fencing, equipment, and graffiti; The cold water machine is great for contractors; 49-State Compliant (Not for sale in California)
Determine Minimum PSI For Your Cleaner Size

Ever wonder why your pressure washer sometimes feels like it’s fighting the brush instead of helping it? The trick is matching the right PSI to the cleaner size you’re using. A 12‑inch cleaner needs at least 3,000 PSI, a 14‑inch model works best with 3,500–4,000 PSI, and anything 18 inch or larger calls for 4,500 PSI or more. If the PSI is too low, the spray drops, the brush stalls, and you waste time and fuel.
Frankly, the first thing I do is check the minimum PSI rating for each cleaner size. That number tells you how much power you really need to keep the spray steady and the brush turning smoothly. I then compare my washer’s rated PSI to the table, making sure it meets or exceeds the minimum. When it falls short, I either drop to a smaller cleaner or upgrade the washer—no point in forcing a weak pump to do a big job.
Worth knowing: a washer that barely meets the minimum can still struggle on tough grime, while a bit more pressure gives you a smoother, faster clean. Here’s a quick way to see if you’re good to go:
- 12‑inch cleaner → 3,000 PSI minimum
- 14‑inch model → 3,500–4,000 PSI range
- 18‑inch or larger → 4,500 PSI or more
If you’re not sure whether your setup is right, try this: run the washer with the brush at low speed and watch for any stutter or loss of spray. A steady stream means you’re in the sweet spot; any wobble signals you need more PSI or a smaller cleaner.
Recommended Products
Package length :15.24 cm

Smart Display & Waterfall Lighting: Experience intuitive control with our interactive display and cascading waterfall lighting. The touchscreen shows working status and modes, while the knob ensures easy adjustments. Enjoy four seasonal hues(Green, Blue, Orange, and White)—seamlessly transitioning for a spa-like ambiance. The softly diffused LED band creates a smooth glow, blending smart functionality with serene relaxation

【Full Featured Smart Toilet】The V01 MAX bidet toilet is equipped with every feature available on the market, making it the ultimate all-in-one solution.
Match Washer Duty Level To Surface‑Cleaner Diameter

Ever felt stuck wondering why your pressure washer and surface‑cleaner just don’t click? The trick is matching the washer’s duty level to the cleaner’s diameter, and it’s easier than you think.
First, check your machine’s PSI and GPM rating. Light‑duty units—under 2,000 PSI and 1.5–2 GPM—pair best with 10‑12‑inch cleaners. Medium‑duty models, sitting at 2,000‑3,000 PSI and 2–3 GPM, work efficiently with 12‑15‑inch units. Heavy‑duty washers, those above 3,000 PSI and pushing 3 + GPM, can handle 20‑inch or larger cleaners without losing power.
Try this:
- Look at the manufacturer’s chart for the exact pressure range each cleaner needs.
- Make sure the cleaner’s pressure requirement meets or exceeds your washer’s output.
- Adjust flow rates if you notice the washer struggling; a little tweak can prevent over‑loading.
Keeping your washer in shape is just as important. Clean the filters regularly, inspect hoses for cracks, and replace worn parts promptly. When the season changes, drain all water, lubricate seals, and store the unit indoors. Those simple steps keep rust at bay and ensure the machine is ready for the next job.
Frankly, a well‑maintained washer not only lasts longer but also delivers consistent performance, so you won’t have to wrestle with weak spray or uneven cleaning. And remember, the right size combo means you waste less water and finish jobs faster.
Do you ever wonder if you’re over‑paying for a cleaner that’s too big for your washer? The answer is usually a simple size check—no need for costly upgrades.
Give it a try and see how much smoother your cleaning routine becomes. Ready to match up and boost your results?
Recommended Products

Hands-Free Auto Open/Close: Sensor lid opens and closes automatically, while foot sensor, side knob, remote, and auto flush reduce hand contact for a cleaner, easier smart toilet experience.

Premium Commercial Performance: Easy-to-start with a robust 420cc 4-stroke OHV horizontal shaft engine, this commercial grade gas pressure washer is ideal for patios, sidewalks, siding, vehicles, heavy machinery, and commercial surfaces, effortlessly removing stubborn dirt, grease, and stains.

[Powerful & Efficient Flush] Featuring advanced 360° siphon vortex jet technology, a large-capacity tank, built-in pump, and anti-clog design, this system provides a strong, thorough flush without relying on water pressure—perfect for households with low water pressure
Verify Quick‑Connect vs. Threaded Fit

Ever noticed how a tiny mismatch in your washer’s hose can turn a simple clean into a leaky mess? When you finally pick the right‑size cleaner for your machine’s duty level, the next thing you’ve got to check is whether the connection type fits your setup. I usually start by looking at the plug: is it a quick‑connect or a threaded fitting? A wrong match can cause leaks, pressure loss, and even corrosion over time.
If your washer sports a 1/4‑inch quick‑connect, make sure the cleaner’s inlet is the same size. If it isn’t, grab an adapter that’s made of corrosion‑resistant material and matches the hose thread rating. For threaded connections, double‑check the thread type—NPT or BSP—and the pitch, then tighten it to the manufacturer’s torque spec. Getting the right adapter eliminates awkward connections, keeps the hose secure, and protects the whole system while you’re running a cycle.
Worth knowing:
- Quick‑connects are handy, but they need an exact size match.
- Threaded fittings demand the correct thread type and pitch.
- Always use a corrosion‑resistant adapter if you have to bridge a gap.
Frankly, a little extra time now saves you a lot of hassle later. A snug, correct fit means no drips, no pressure drops, and a longer‑lasting setup. So, before you fire up the cleaner, give those connections a quick double‑check. Doesn’t that feel like a smart move?
Ready to keep your washer running cleanly? Try this: keep a small kit of adapters and a torque wrench on hand for quick fixes.
Recommended Products

Schieffer 1/4" x 200' 4400 PSI Thermoplastic Sewer Jetter Hose
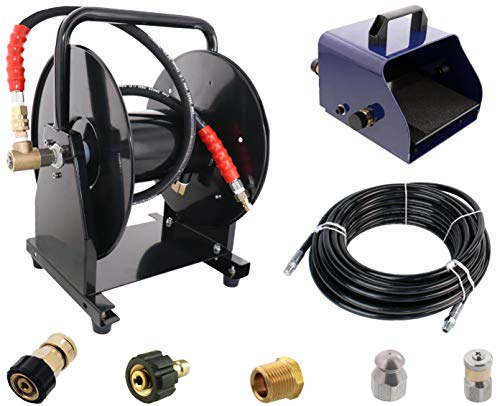
Schieffer 1/4" x 150' 4400 PSI Thermoplastic Sewer Jetter Hose

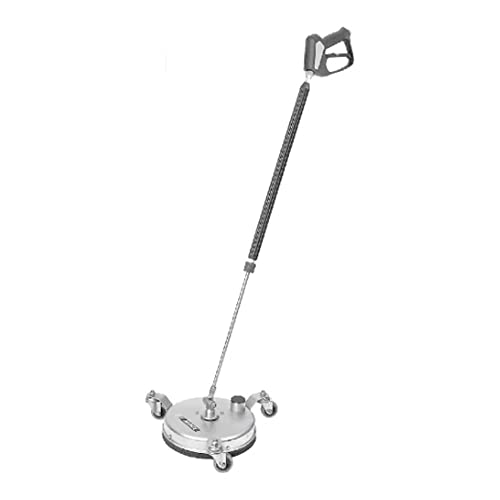
PROFESSIONAL CLEANING – The Lidodola surface cleaner delivers commercial-grade cleaning across a 30" wide area, effortlessly removing stubborn stains on large flat surfaces like patios, driveways, decks, and sidewalks.
Spot Undersized Surface‑Cleaner Symptoms

Ever wonder why your pressure‑washer cleaner feels like it’s fighting a losing battle? If the water stream sputters, the brush spins slower than it should, or the housing heats up fast, you’re probably using a cleaner that’s too small for your PSI and GPM.
When the nozzle can’t push enough water, the cleaning power drops and the motor starts to strain. You’ll notice an uneven spray pattern, the brush stalling now and then, and the unit pulling more amperage than it’s supposed to. Those are clear signs the cleaner isn’t keeping up with your washer’s output.
Here’s the trick: check the PSI‑to‑diameter ratio and match the GPM rating to a bigger cleaner. Keep an eye on the amperage while you’re working. If you see the numbers climbing, it’s a warning that the motor is being overworked.
Fair warning: using an undersized cleaner can wear out your pump faster and waste your time. A properly sized unit will give you a steady flow, protect the motor, and boost overall cleaning efficiency.
- Verify the PSI‑to‑diameter ratio for your specific washer model.
- Choose a cleaner whose GPM rating meets or exceeds your washer’s output.
Try this: after swapping to a larger cleaner, run a short test and watch the brush spin smoothly and the housing stay cool. You’ll see the difference right away.
Do you want a smoother, faster clean without stressing your equipment? Give the right‑sized cleaner a try and feel the improvement.
Spot Oversized Surface‑Cleaner Symptoms
Ever notice your pressure washer getting sluggish when you slap a big surface‑cleaner on it? That’s a sign the cleaner’s diameter is out‑gunning the pump’s capacity. You’ll hear the motor work harder, feel the pump heat up, and see the water spray thin out. The flow gets uneven, leaving some spots barely agitated while others get blasted, which messes up the overall clean.
Frankly, I’ve seen a 20‑inch cleaner on a 4 GPM pump drop cleaning efficiency by about 30 % and fuel use jump 12 %. The drag on the rotating assembly forces the motor to push harder, and the pump temperature climbs. Those symptoms add up fast, especially when you’re trying to finish a job on time.
Worth knowing: match the cleaner size to the pump’s “4‑inch‑per‑GPM” rule, or upgrade to a higher‑flow washer. Here’s a quick checklist to keep things running smooth:
- Keep the cleaner’s diameter within the pump’s capacity.
- Watch for a louder pump hum and higher temperature.
- Check the water spray for thinning or uneven spots.
If you notice the brush moving slower than usual, it’s a clear hint that you’re overloading the system. The extra drag not only slows the job down but also wears out the motor faster. Cutting back on size or swapping in a bigger pump will restore the flow and keep fuel use in check.
Try this: before you start a big job, measure the cleaner’s diameter and compare it to your pump’s rating. If it’s too big, either swap the cleaner for a smaller one or bring a higher‑flow washer to the site. This simple step can save you time, money, and a lot of frustration.
You’ll end up with a more even agitation across the surface and a cooler, quieter pump. Have you tried matching your cleaner size to your pump’s capacity yet?
Choose Material & Wheel Design For Your Surface‑Cleaner
Choosing the right material and wheel design for your surface‑cleaner can feel like a guessing game, especially when you’re juggling heavy‑duty jobs and light residential chores. You want wheels that won’t bend under pressure, yet stay light enough to carry around the house.
First, think about the job’s demands. For tough, commercial work, steel wheels are a solid pick—they hold up under high PSI and won’t warp. If you’re mostly cleaning patios or decks at home, aluminum alloys keep the unit lighter, making it easier to maneuver up stairs or into a truck.
Polyurethane coatings add a nice grip on uneven ground and protect flooring from scratches. I’ve found that sealed bearings are a lifesaver; they block water from getting inside, and a quick clean‑lubricate‑inspect routine every few months keeps the wheels smooth and wobble‑free.
Here’s the trick: match the wheel material to your pressure washer’s PSI and GPM. When they’re in sync, vibration drops, your arms stay less sore, and the cleaning stays even across different surfaces.
- Steel wheels for heavy‑duty tasks
- Aluminum alloys for lighter, residential use
- Polyurethane coating for traction and scratch protection
For tight spots, swivel wheels that lock in place give you stability without sacrificing flexibility. And don’t forget to check the bearings regularly—clean them, add a little oil, and look for any signs of wear.
Frankly, a little extra care now saves you from costly replacements later.
Worth knowing: keep an eye on how the wheels feel after each job; if they start to feel loose or noisy, it’s time for a quick inspection.
Got a favorite wheel setup that’s worked for you? Let’s hear about it.
Recommended Products

We have USA stock and can ship you by local truck next day after you ordered,all cost covered.You never have to wait for long time and never have customs clearance issue.

Heavy-Duty 2400W Performance (20A / 120V) – A powerful 3.26 HP motor delivers up to 222 CFM and 19 kPa/76" water lift of suction, giving you the airflow you need for jobsite cleanup, garages, shops, and commercial environments. 80dB
Installation Checklist: Connect Your Surface Cleaner
Ever tried to hook up a surface cleaner to your pressure washer and felt the whole thing could fall apart? You’re not alone—getting the wheel, hoses, and pressure right can be a real hassle.
First, double‑check that the wheel material and design you picked match your washer’s PSI and GPM. If they don’t line up, you’ll get vibration and the wheel can wear out fast. Then run a quick safety check: make sure the power’s off, look over the hoses for any cracks, and confirm the quick‑connect is snug.
Next, think about hose routing. Keep the line short, avoid any kinks, and steer clear of hot surfaces or sharp edges. That will help you keep the pressure steady and prevent leaks.
Now, align the wand with the cleaner’s inlet and tighten the threaded fitting to the manufacturer’s torque spec. Give the swivel wheel a spin—if it moves freely, you’re good to go. After that, test the unit on a small patch. Watch for leaks or strange noises, and tweak the pressure settings if needed.
Worth knowing: a short test run can save you from a costly repair later. If you notice any wobble, stop and re‑check the wheel and hose connections before you move on.
Give it a try and see how much smoother the cleaning goes. Ready to get your surface cleaner working like a charm?
Frequently Asked Questions
Does Water Temperature Affect Surface Cleaner Performance?
I’d say water temperature can boost cleaning chemistry, letting detergents work faster and grime loosen easier, so hotter water generally improves surface cleaner performance—just don’t exceed the washer’s safe temperature limits.
Can I Use a Surface Cleaner on a Low‑Pressure Electric Washer?
I’d say you can try it, but low‑pressure compatibility is limited; you’ll need nozzle adaptations to boost flow and pressure, otherwise the cleaner won’t work efficiently and could strain the washer.
How Often Should I Replace the Spray Tips on a Surface Cleaner?
I replace the spray tips roughly every 6‑12 months, depending on usage, because regular tip maintenance preserves nozzle lifespan and prevents uneven cleaning or premature wear.
What Is the Best Way to Store a Surface Cleaner When Not in Use?
I store my surface cleaner in dry storage, hanging it on a wall with hanger mounting so it stays protected from moisture and ready for the next job.
Are There Any Safety Concerns With Using a Surface Cleaner on Uneven Surfaces?
I’d say watch for a trip hazard on uneven ground; the cleaner can wobble, and splashback mitigation isn’t reliable, so I’d avoid using it there to prevent slips and equipment damage.


